基于Unity URP实现TAA
基于Unity URP实现TAA
今天我们来实现在 URP管线中实现TAA算法。虽然最新的 URP中已经提供了实现,但是为了理解透彻,我们将从零开始实现,当然也会借鉴已有的实现来来分析。最终的结果应该就是把 URP原本的实现抄一遍。
使用 RenderFeature搭建基本流程
首先创建一个 RenderFeature,命名为 TAARenderFeature
然后实现Feature的内容
using Unity.VisualScripting;
using UnityEngine;
using UnityEngine.Rendering;
using UnityEngine.Rendering.Universal;

public class TAARenderFeature : ScriptableRendererFeature
{
    class TAARenderPass : ScriptableRenderPass
    {
        private static readonly string s_PassName = "TAA Render Pass";
        private static readonly string s_TempRTName = "_TempRT";
        private RTHandle m_Source;

        private float m_BlendFactor;
        private RenderTexture m_HistoryTexture;
        private Shader m_TAAShader;
        private Material m_Material;

        public TAARenderPass(float blendFactor)
        {
            m_BlendFactor = blendFactor;
            m_TAAShader = Shader.Find("Hidden/TAAShader");
            if (m_TAAShader != null)
            {
                m_Material = new Material(m_TAAShader);
            }
        }

        public void SetUp(RTHandle source)
        {
            m_Source = source;
            if (m_HistoryTexture == null || m_HistoryTexture.width != m_Source.rt.width ||
                m_HistoryTexture.height != m_Source.rt.height)
            {
                if (m_HistoryTexture != null)
                {
                    m_HistoryTexture.Release();
                }
                m_HistoryTexture = new RenderTexture(m_Source.rt.width, m_Source.rt.height, 0,RenderTextureFormat.ARGBHalf);
            }
        }

        public override void Execute(ScriptableRenderContext context, ref RenderingData renderingData)
        {
            if (m_TAAShader == null || m_Material == null)
            {
                return;
            }

            if (m_HistoryTexture == null)
            {
                return;
            }

            CommandBuffer cmd = CommandBufferPool.Get();
            cmd.name = s_PassName;
            int tempRTId = Shader.PropertyToID(s_TempRTName);
            cmd.SetGlobalFloat("_BlendFactor", m_BlendFactor);
            cmd.SetGlobalTexture("_HistoryTex", m_HistoryTexture);
            cmd.GetTemporaryRT(tempRTId, m_Source.rt.descriptor);
            cmd.Blit(m_Source, tempRTId, m_Material);


            cmd.Blit(tempRTId, m_HistoryTexture);

            cmd.Blit(tempRTId, m_Source);

            cmd.ReleaseTemporaryRT(tempRTId);

            context.ExecuteCommandBuffer(cmd);

            CommandBufferPool.Release(cmd);
        }
    }

    [Range(0.01f,1.0f)]
    public float m_BlendFactor = 0.01f;

    TAARenderPass m_TAARenderPass;

    public override void Create()
    {
        m_TAARenderPass = new TAARenderPass(m_BlendFactor);

        m_TAARenderPass.renderPassEvent = RenderPassEvent.BeforeRenderingPostProcessing;
    }

    public override void AddRenderPasses(ScriptableRenderer renderer, ref RenderingData renderingData)
    {
        renderer.EnqueuePass(m_TAARenderPass);
    }

    public override void SetupRenderPasses(ScriptableRenderer renderer, in RenderingData renderingData)
    {
        if (m_TAARenderPass != null)
        {
            m_TAARenderPass.SetUp(renderer.cameraColorTargetHandle);
        }
    }
}
还有Shader的内容:
HLSLPROGRAM
            #pragma vertex vert
            #pragma fragment frag

            #include "Packages/com.unity.render-pipelines.universal/ShaderLibrary/Core.hlsl"
            #include "Packages/com.unity.render-pipelines.universal/ShaderLibrary/Lighting.hlsl"

            struct appdata
            {
                float4 vertex : POSITION;
                float2 uv : TEXCOORD0;
            };

            struct v2f
            {
                float2 uv : TEXCOORD0;
                float4 vertex : SV_POSITION;
            };

            sampler2D _MainTex;
            sampler2D _HistoryTex;
            float _BlendFactor;

            v2f vert (appdata v)
            {
                v2f o;
                o.vertex = TransformObjectToHClip(v.vertex);
                o.uv = v.uv;
                return o;
            }

            float4 frag (v2f i) : SV_Target
            {
                // 1. 采样当前帧
                float3 currentColor = tex2D(_MainTex, i.uv).rgb;

                // 2. 采样历史帧
                float3 historyColor = tex2D(_HistoryTex, i.uv).rgb;

                // 3. 混合结果
                float3 result = lerp(historyColor, currentColor, _BlendFactor);

                return float4(result, 1.0);
            }
            ENDHLSL
        }
这样就实现了TAA的基本流程,没有抖动,没有颜色空间变换,没有裁剪,只有一个简单的插值。接下来就是在这个基础上去改进。
加入投影抖动(Jitter Matrix)
在进行抖动数值计算之前,这里要提到一个 低差异序列的概念。诚然,我没有理解什么叫低差异序列,但根据公开的资料表示,它是一个均匀的序列。在大多数TAA的实现中,用的是 Halton Sequence。它的实现如下,我们可以直接使用,输入的 index表明序列中第几个数,radix是底数
public static class HaltonSequence
{
        /// <summary>
        /// Gets a deterministic sample in the Halton sequence.
        /// </summary>
        /// <param name="index">The index in the sequence.</param>
        /// <param name="radix">The radix of the sequence.</param>
        /// <returns>A sample from the Halton sequence.</returns>
        public static float Get(int index, int radix)
        {
            float result = 0f;
            float fraction = 1f / radix;

            while (index > 0)
            {
                result += (index % radix) * fraction;

                index /= radix;
                fraction /= radix;
            }

            return result;
        }
}
在Unity URP中,取的是前1024个序列点,但是根据公开资料,似乎取前8或前16即可,所以在网上看到的都是模8或模16。
static internal Matrix4x4 CalculateJitterMatrix(ref CameraData cameraData)
{
            Matrix4x4 jitterMat = Matrix4x4.identity;

            bool isJitter = cameraData.IsTemporalAAEnabled();
            if (isJitter)
            {
                int taaFrameCountOffset = cameraData.taaSettings.jitterFrameCountOffset;
                int taaFrameIndex = Time.frameCount + taaFrameCountOffset;

                float actualWidth = cameraData.cameraTargetDescriptor.width;
                float actualHeight = cameraData.cameraTargetDescriptor.height;
                float jitterScale = cameraData.taaSettings.jitterScale;

                var jitter = CalculateJitter(taaFrameIndex) * jitterScale;

                float offsetX = jitter.x * (2.0f / actualWidth);
                float offsetY = jitter.y * (2.0f / actualHeight);

                jitterMat = Matrix4x4.Translate(new Vector3(offsetX, offsetY, 0.0f));
            }

            return jitterMat;
}

static internal Vector2 CalculateJitter(int frameIndex)
{
            // The variance between 0 and the actual halton sequence values reveals noticeable
            // instability in Unity's shadow maps, so we avoid index 0.
            float jitterX = HaltonSequence.Get((frameIndex & 1023) + 1, 2) - 0.5f;
            float jitterY = HaltonSequence.Get((frameIndex & 1023) + 1, 3) - 0.5f;

            return new Vector2(jitterX, jitterY);
}
Jitter矩阵的设置,是在渲染物体之前设置的,设置在投影矩阵上,所以可以知道,该抖动影响的是物体的渲染投影的位置,而不是在后处理时给 uv施加偏移。所以如果单纯地用 RenderFeature来实现,是做不到的,需要修改URP的一些方法,来允许我们设置Jitter矩阵,并最终应用到物体渲染中。
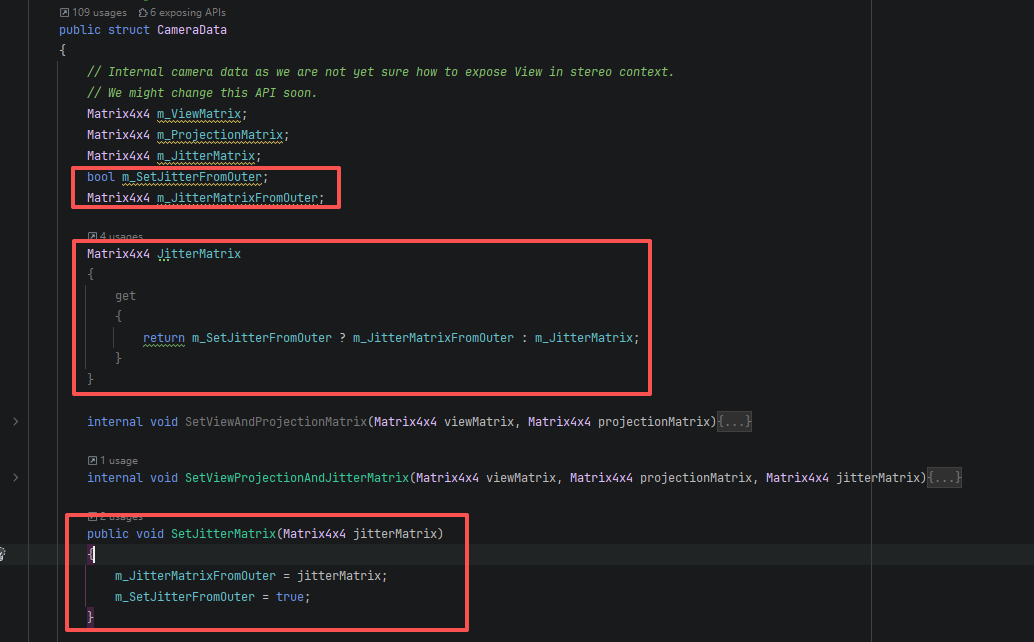
我们还需要查找 m_JitterMatrix使用的位置,替换成我们新加的 JitterMatrix,这样就可以根据是否被外部修改来选择 JitterMatrix的值。当然,这是为了将我们新加的内容,嵌入到URP管线中,并且改动最小。
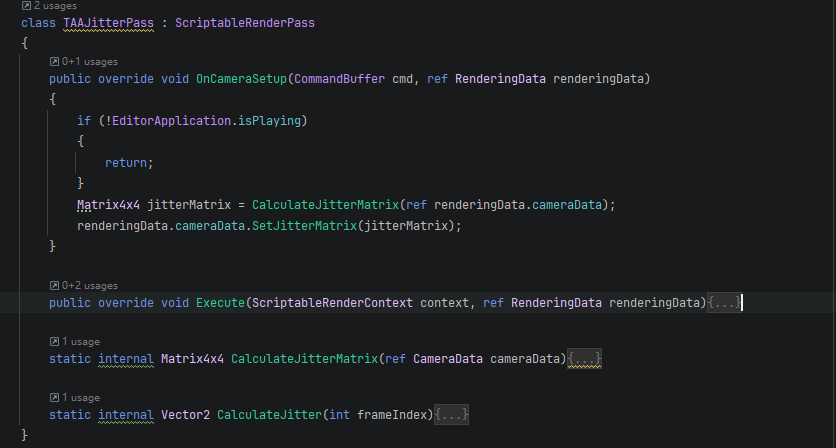
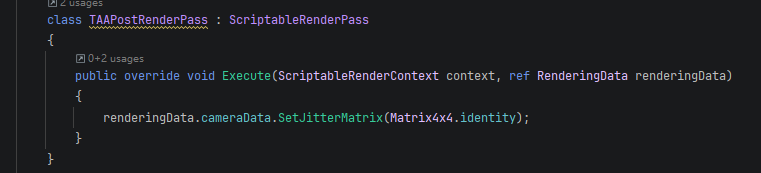
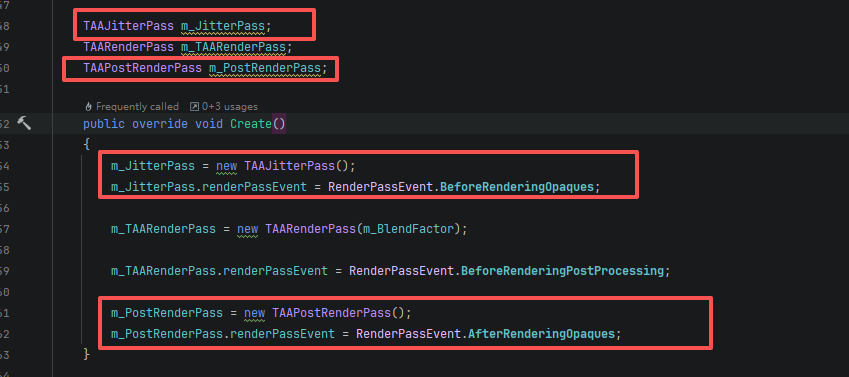
接下来增加两个 RenderPass,用来设置和还原 JitterMatrix。
颜色空间转换和裁剪
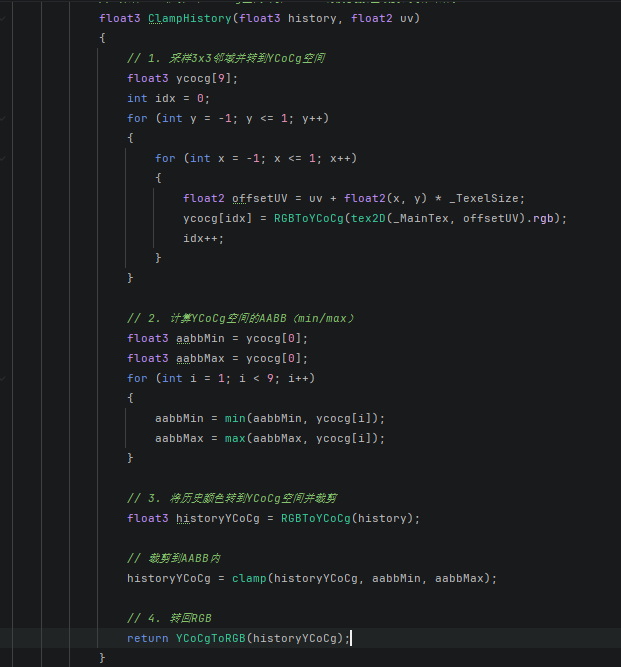
转换颜色空间,即将线性的 RGB转换到 YCoCg空间再进行裁剪计算。裁剪就是取当前采样位置周围的颜色值,计算出 Min和 Max,然后将历史帧颜色 History,限制在该范围内,比较简单的实现是直接采样中心点周围九宫格的位置,然后计算出 Min和 Max,进行截断计算。这样就能减少鬼影的影响。
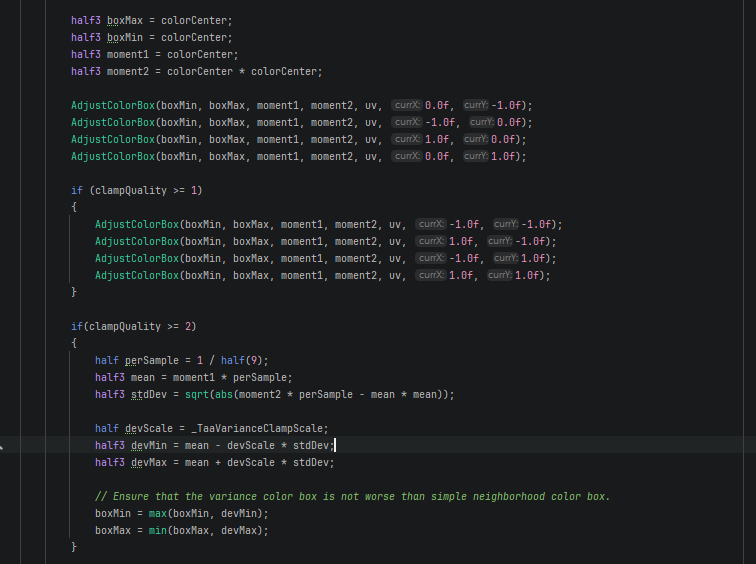
Unity的实现就比较复杂,抛开 Montion Vector。默认等级只采5个点。配置等级稍高一点就采到周围9个,而更高等级计算方差和均值[2],实现更好的效果,计算量也更大。

Motion Vector
根据AI给出的建议,Motion Vector可以从深度去还原世界空间坐标,然后再重投影回原来的投影位置,计算出 uv偏移,这就是 Motion Vector,这样就是需要采样一次深度图和矩阵计算。Unity的做法是专门渲染一张图,用来记录偏移量,这部分渲染的内容还没有找到,不过如果是记录到图上,那么就是对物体进行多一次渲染,我估计是只针对运动物体渲染,不然感觉性能上得不偿失。

那么我们这里就只从深度来还原 Motion Vector,代码如下:
// --- Motion Vector: 深度重投影 ---
float2 ComputeMotionVector(float2 uv)
{
                float rawDepth = SAMPLE_DEPTH_TEXTURE(_CameraDepthTexture, uv);
                float4 ndcPos = float4(uv.x * 2.0 - 1.0, uv.y * 2.0 - 1.0, rawDepth, 1.0);

                float4 worldPos = mul(_CurrentInverseVP, ndcPos);
                worldPos.xyz /= worldPos.w;
                worldPos.w = 1.0;

                float4 prevClipPos = mul(_PreviousVP, worldPos);
                float2 prevUV = prevClipPos.xy / prevClipPos.w * 0.5 + 0.5;

                return uv - prevUV;
}
可以看到,需要采样深度图,增加一些变换矩阵:
- _CameraDepthTexture:场景深度图
- _CurrentInverseVP:当前帧
View - Projection - _PreviousVP:前一帧的
View - Projection
该函数可以计算出 uv的偏移量,然后结合偏移量去采样历史帧,得到的颜色会更接近物体原本的颜色,减少由于视图信息变化导致的历史信息不正确的现象。
float3 currentColor = tex2D(_MainTex, i.uv).rgb;

// Motion Vector 重投影
float2 motion = ComputeMotionVector(i.uv);
float2 historyUV = i.uv - motion;

// 越界检测:历史UV在屏幕外则直接用当前帧
bool validHistory = all(historyUV >= 0.0) && all(historyUV <= 1.0);
float3 historyColor = validHistory ? tex2D(_HistoryTex, historyUV).rgb : currentColor;

// YCoCg 空间裁剪历史
historyColor = ClampHistory(historyColor, i.uv);

float3 result = lerp(historyColor, currentColor, _BlendFactor);
return float4(result, 1.0);
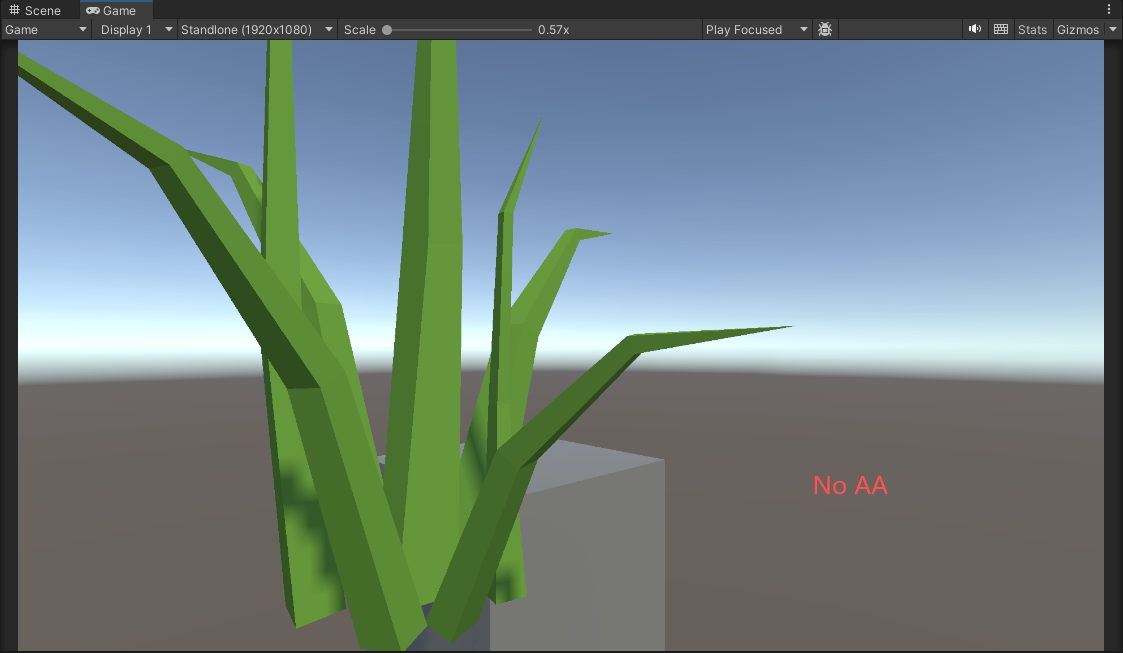
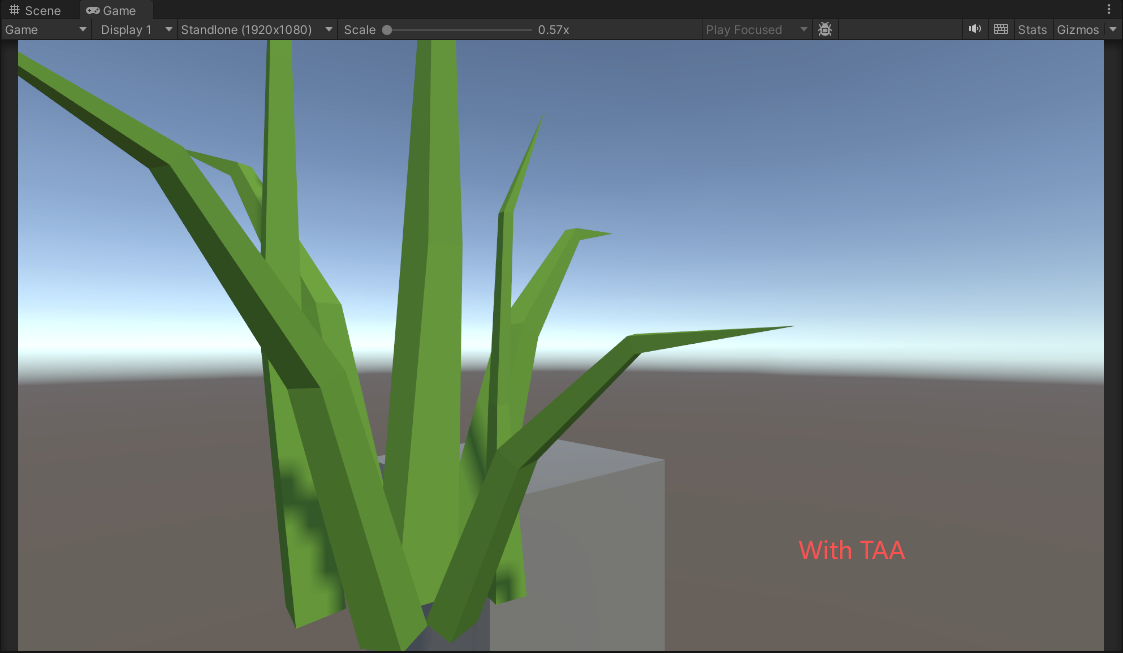
可以对比下面两张图,可以看到边缘的变化:
参考资料
[2] GDC 2016. "An excursion in temporal super sampling"